
I wanted to document this because I almost ignored the warning at first. My Raspberry Pi 4 was still running, but DietPi kept flagging the CPU temperature as too high.
This Pi is part of my wider homelab, not just a standalone board. I keep Tailscale on it so I can securely reach it from my Labuan side while the device is located at my Kota Kinabalu site. That lets me handle normal admin checks and troubleshooting remotely without opening extra public ports. If you want the broader homelab layout and cross-site flow, I documented it here: Two Proxmox nodes, three places, one tailnet: how my homelab is wired.
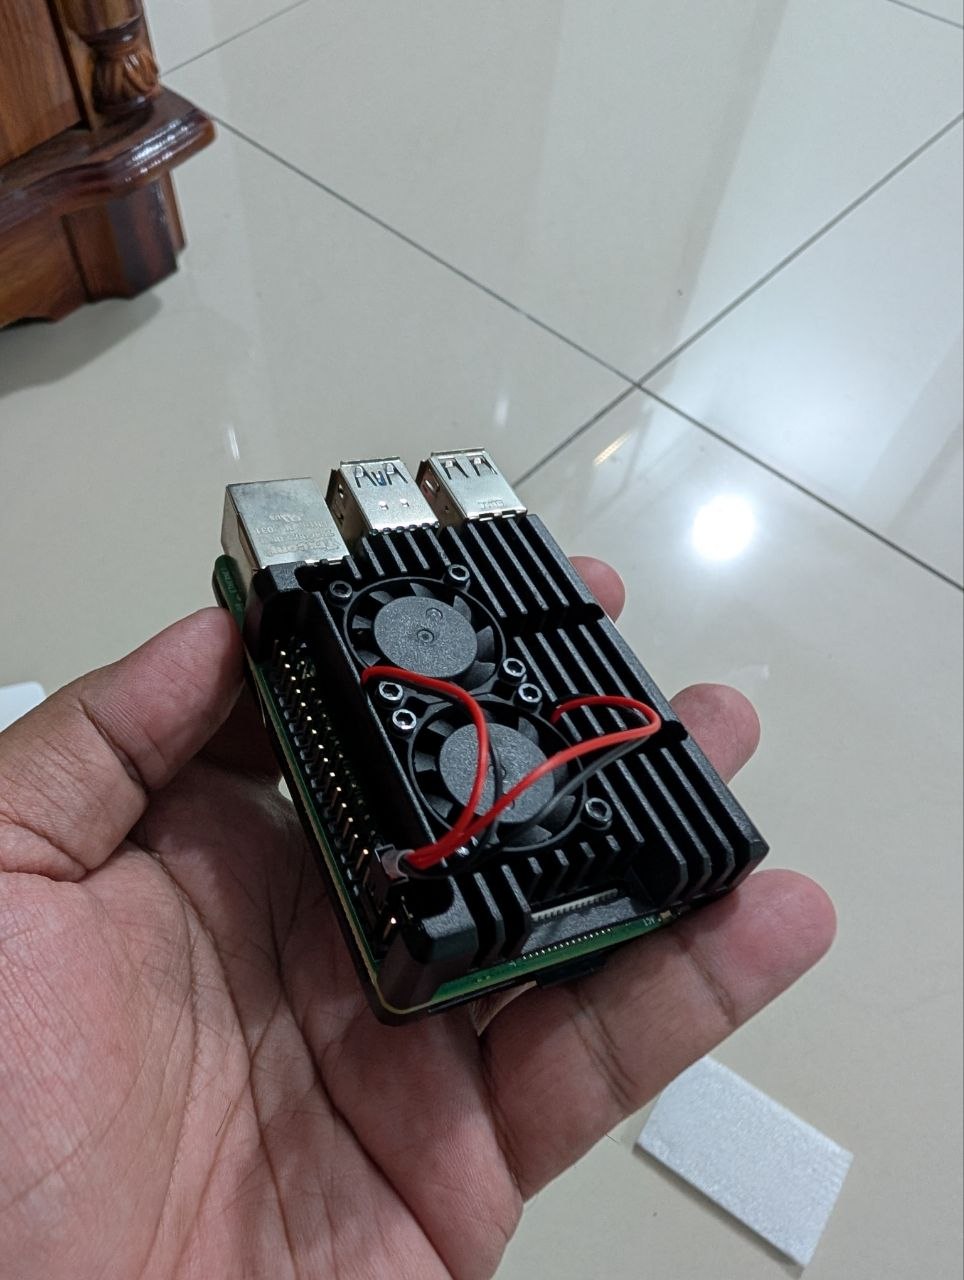
The fix ended up being straightforward. I replaced the old closed case with an open aluminum heatsink and dual-fan setup, then rewired fan power through the GPIO pins.
TL;DR
- Problem: Pi 4 in old case was running around
66 C(150 F) with DietPi warning. - Change: swapped to open heatsink + dual-fan casing.
- Wiring: fan power to GPIO
5VandGND(using the pin map below). - Result: temperature dropped to around
42 C(107 F) and DietPi reported optimal range. - Use case: good upgrade if your Pi runs services 24/7 and sits in warm ambient conditions.
Before vs after at a glance
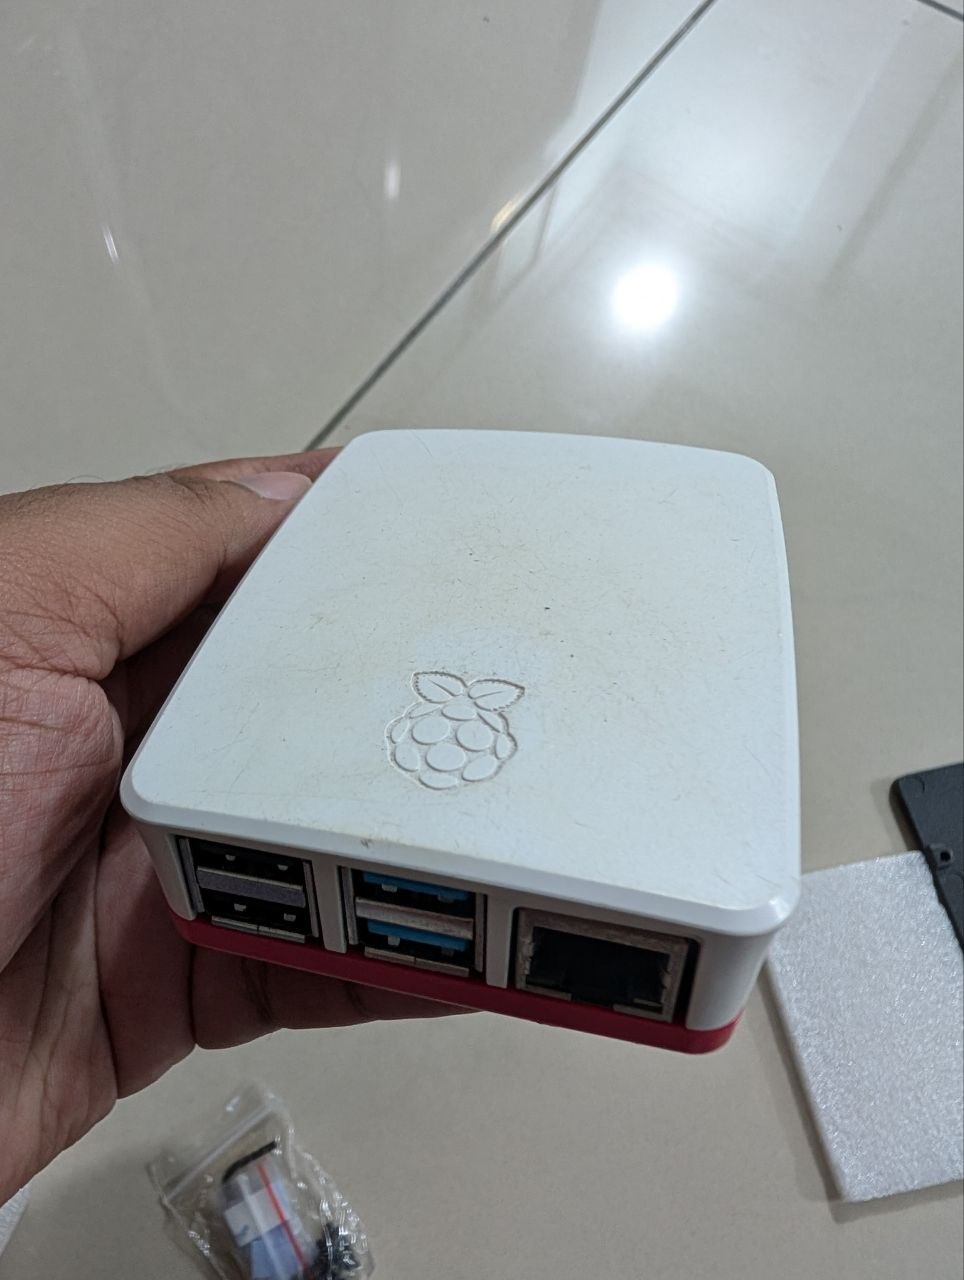
Before (closed case):
After (open dual-fan heatsink setup):
On this page
- What I was seeing before
- The hardware swap
- How I wired the fan pins
- Results after boot
- Quick checklist if you want to copy this
- Reference
- Closing
What I was seeing before
My Pi was in a closed white case with limited airflow. It looked clean, but thermals were not great for continuous workloads.
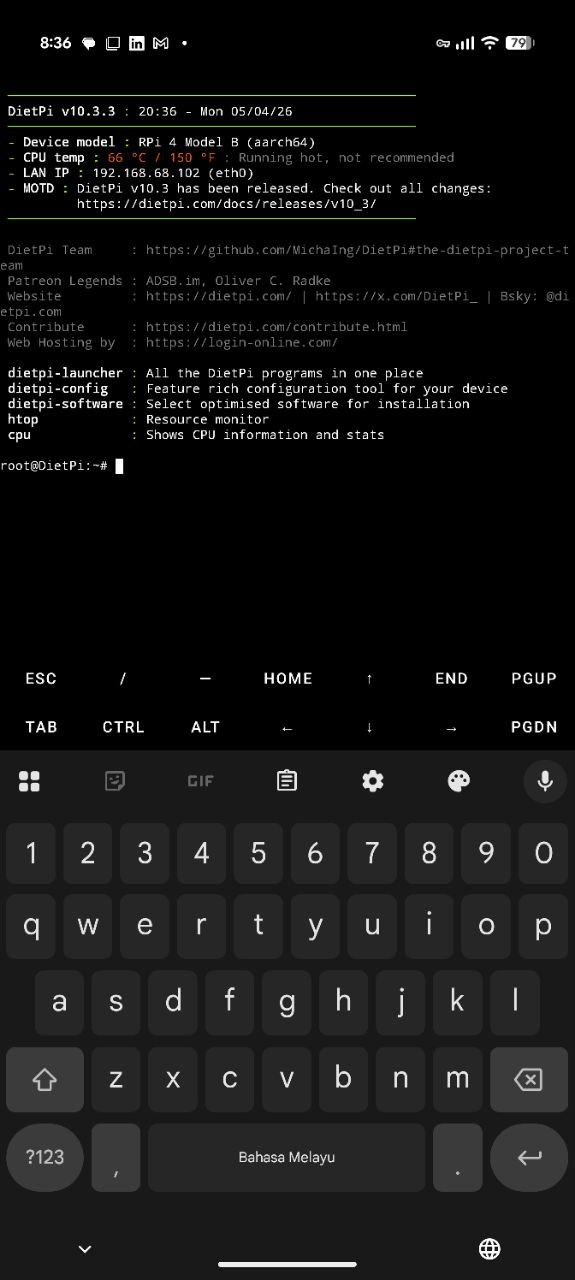
DietPi showed:
- CPU temperature around
66 C(150 F) - "Running hot, not recommended"
The hardware swap
I removed the old enclosure and switched to a more airflow-focused setup:
- Open aluminum heatsink body.
- Two small fans mounted on top.
- Better direct contact and airflow over the board.
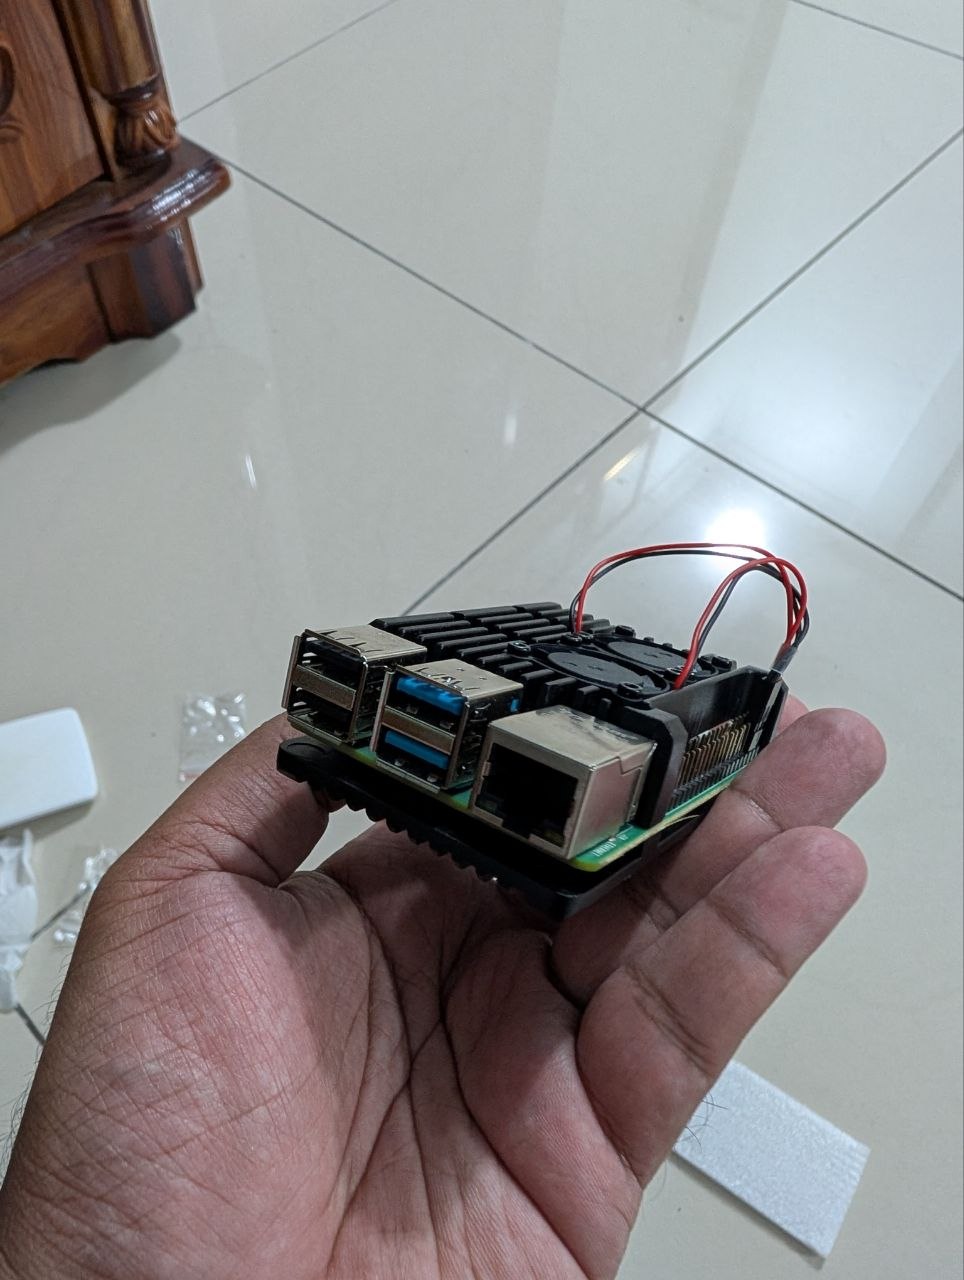
The board after removing the old case:
How I wired the fan pins
For this setup, fan power is taken from the GPIO header:
- 5V: first or second pin on the right column (top side orientation shown in image)
- GND: third pin on the right column
I used the simple pin reference below while wiring:
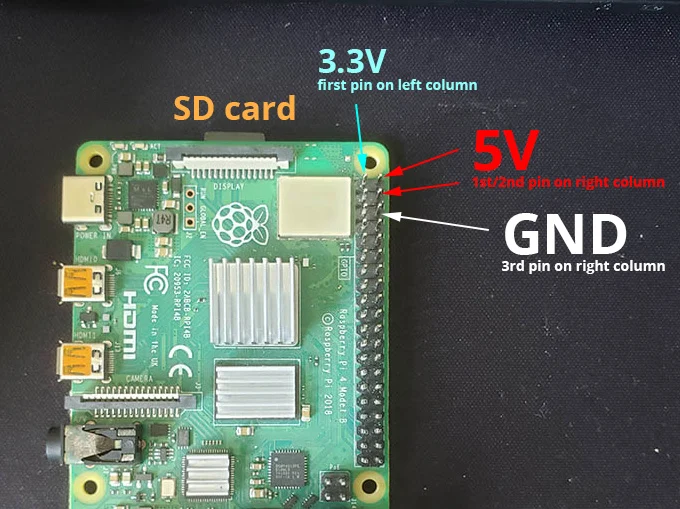
Important safety note: always power off the Pi before connecting or moving GPIO fan wires.
Results after boot
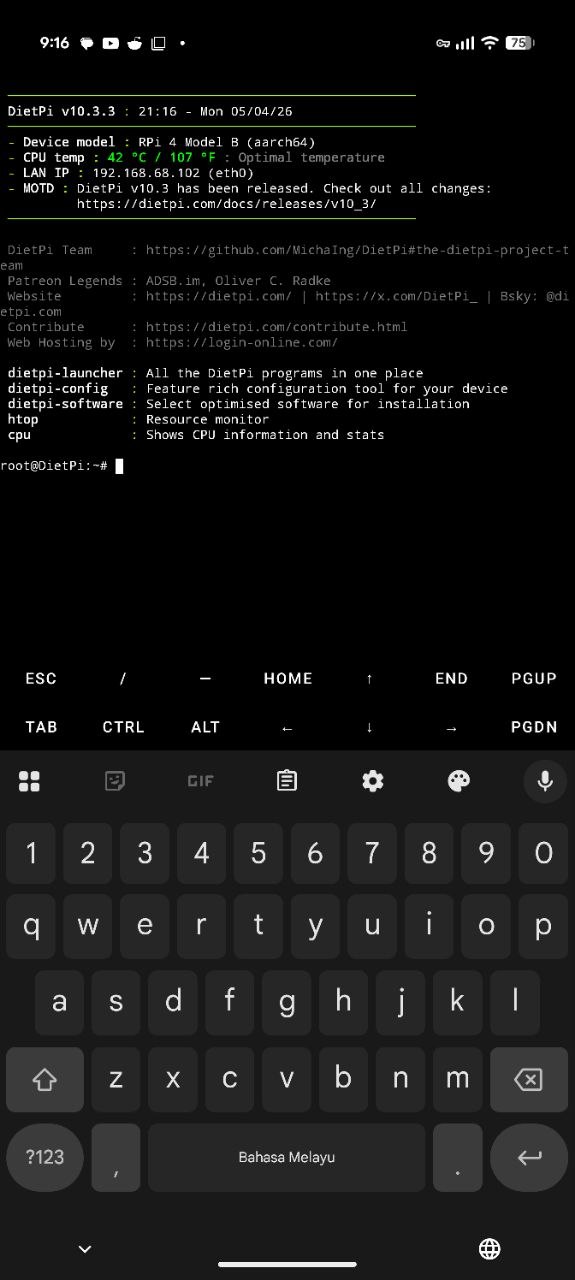
After booting back into DietPi with the new cooling setup:
- CPU temperature reported around
42 C(107 F) - status changed to "Optimal temperature"
That is roughly a 24 C drop in my setup.
Quick checklist if you want to copy this
- Take a "before" reading from
dietpi-launcherorhtop. - Power off and unplug the Pi.
- Move board into heatsink/fan case.
- Connect fan wires to correct
5VandGNDpins. - Boot and verify temperatures again after a few minutes.
- Observe for at least 15 to 30 minutes under your normal load.
Reference
Closing
This was a small hardware change, but it made a big difference for day-to-day stability confidence. If your Pi is always-on, treat cooling as part of core reliability, not just a nice add-on.
If you are planning a similar upgrade, log your before/after readings. Even simple documentation like this helps when you troubleshoot later.

